If you have questions or suggestions for improving these fonts, you may contact the author at [email protected].
Paleo-Hebrew Fonts
Kris J. Udd has created a beautiful collection of fonts that imitate the writing styles of ancient scribes in a series of important ancient Semitic texts.


Click on the graphic to download a full comparison chart (pdf)
For Free Download:
Proto-Sinaitic (15th c.)
Proto-Sinaitic (13th c.)
Izbet Sartah (13th c.)
Ugaritic (13th c.)
Tell Zayit (10th c.)
Gezer Calendar (10th c.)
Tel Dan Inscription (9th c.)
Moabite Stone (9th c.)
Samaria Ostraca (8th c.)
Siloam Inscription (7th c.)
Yavneh Yam (7th c.)
Hebrew Seals (7th c.)
Ketef Hinnom 1 (7th c.)
Ketef Hinnom 2 (7th c.)
Lachish Letter 3 (6th c.)
Lachish Letter 4 (6th c.)
Lachish Letter 5 (6th c.)
Ivory Pomegranate (6th c.)
Isaiah Scroll (2nd c.)
Nabataean (1st c.)
Samaritan (13th c. AD)
For ancient Greek fonts, see this page.
These fonts follow the basic key-mapping of the BibleWorks™ Hebrew font, with a few exceptions. Since the Masoretic text does not use word dividers, and many ancient Hebrew inscriptions do, the “period” key has been used for the word divider dot, both upper and lower case. Also, since many ancient inscriptions have missing text, the bracket keys (upper case “9” and “0”) have been used for brackets so that reconstructed text can be set off from certain text.
Each letter appears on the appropriate key both in the lower and upper case. A balance has been sought between using the letter forms most common to a particular inscription and showing the variety of letter forms that appear in it. In some cases this has proven particularly difficult due to the number of letters and shapes employed by an ancient scribe. Letters that do not occur in an inscription have usually been reconstructed in hollow letter form to set them off.
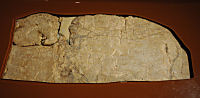
Siloam Inscription
Installation Instructions
How to install the fonts in Windows (or see these instructions from Microsoft):
- Download the fonts into the C:\Windows directory. If you download the Zip files, use a decompression utility like WinZip or 7-Zip to extract the fonts to the C:\Windows directory.
- Click on the “Start” button, then “Settings” and select “Control Panel.” Double click the “Fonts” icon. You will be in C:\Windows\Fonts and see all your fonts. Click on “File,” then “Install New Font.” You should see the fonts you just put in the C:\Windows directory. Highlight those fonts and click OK.
Copyright Information
These fonts are copyrighted by Kris J. Udd and may be distributed free of charge for personal or educational use. They may not be used for profit or for any other purpose without written permission.