fbpx

Egypt has announced the discovery of a Greco-Roman temple near the Siwa Oasis in the Western Desert.

The world’s oldest bridge, a 4,000-year-old Sumerian structure, will be preserved through a partnership between Iraq and the British Museum. There’s a video here.

The Denver Museum of Nature & Science is exhibiting ten fragments from the Dead Sea Scrolls, along with 600 artifacts, until September 3.

CBS News reports on rival groups seeking to leverage technology to read 2,000-year-old charred Herculaneum scrolls.

Michael Rakowitz has recreated one of the lamassu from Nineveh that was destroyed by ISIS. It is now on display in Trafalgar Square.

“The Acropolis Museum in Athens is welcoming the summer season with an extraordinary free concert of music played on an ancient Greek water-organ.” You can see a reproduction in operation here.

The Council on Library and Information Resources (CLIR) has received a million dollar grant “to implement a sustainable, extensible digital library platform and set of curatorial processes to federate records relating to the cultural heritage of the Middle East.”

A box in storage at Swansea University in Wales was discovered to contain a relief of Hatshepsut.

Nachliel Selavan guides tours through the Metropolitan Museum of Art that focus on the Exodus story.

A post adapted from the new ESV Archaeology Study Bible identifies the “10 Most Significant Discoveries in the Field of Biblical Archaeology.”

HT: Ted Weis, Charles Savelle, Joseph Lauer, Agade, Steven Anderson

Share:
(Post by A.D. Riddle)

Oftentimes, while researching archaeological sites and/or biblical places, I come across things like this:

map reference 193.142
M.R. 219156
1972 1954

These are grid coordinates for sites. One encounters them in key works such as The New Encyclopedia of Archaeological Sites in the Holy Land (5 vols.), Anchor Bible Dictionary, or the volumes from the archaeological survey of Israel. I want to locate these sites in Google Earth, but how do I convert them? (This subject came to mind while reading Chris McKinny’s post on Shaaraim [see here].)

There are two coordinate systems for Israel, the Old Israeli Grid and the New Israeli Grid. Sometimes these are abbreviated OIG or NIG, but typically no indication is given as to which coordinate system is being used. (To read more about OIG, see this page, and for NIG this page.) I have found that most coordinates are according to OIG, even in newer publications. I am going to assume we are using OIG. (If not, hopefully the results are so wrong that one can tell right away that they are not OIG. This point highlights the fact that you need already to have some kind of rough idea where the right location is so that you can verify the results.)

The coordinates should have an even number of digits. Sometimes they are divided in half by a space, period, or slash, but other times there is nothing separating the string of digits.

If you are given six digits, then the first three digits give one coordinate and the second three digits give the other coordinate. If you are given eight digits, then the first four are one coordinate and the second four are the other. And so on.

The first coordinate gives the easting position (think longitude or x-axis), and the second coordinate gives the northing position (think latitude or y-axis). In other words, the coordinates give you lon/lat. This is the opposite order we normally use of lat/lon for geographic coordinates.

The first (easting, x) coordinate is actually always six digits. If you are only given three digits, then you need to append three zeros to the right side. If you are given four digits, then append two zeros to the right side.

The second coordinate, on the other hand, can be six or seven digits, and is a little more complicated. For the second (northing, y) coordinate, if you are given three digits, then you have to append a “1” to the left side and three zeros to the right side.

With these expanded coordinates, you can now make the conversion using a fantastic website named “The World Coordinate Converter.” (Thanks to Shawn French for finding this gem.) In the top right, from the first dropdown list, scroll down to Israel and select Israel 1923. This is the Old Israeli Grid.

Then, paste the coordinates into the fields. Below this in the second dropdown list, you will need to select “WGS 84/Pseudo-Mercator.” It is found under *World, which is the first group of reference systems. This is the datum used by Google Earth. Finally, click Convert and voila! you have coordinates that you can copy/paste into Google Earth/Maps.

Here are three examples.

Khirbet Jazzir

  1. Anchor Bible Dictionary gives the coordinates 219156 for Khirbet Jazzir. This is thought to be the most likely site for the Levitical city Jazer.
  2. The easting (longitude, x-axis) coordinate is 219. We need to add three zeros to make this a six digit number, namely 219000.
  3. The northing (latitude, y-axis) coordinate is 156. We need to add a “1” to the left and three zeros to the right to get 1156000.
  4. Now go to “The World Coordinate Converter,” select Israel 1923, and paste in the expanded coordinates in the same order they were given to us, 219000, 1156000. Make sure you are converting to “WGS 84/Pseudo-Mercator” and click the Convert button.
  5. The converter generates the following lat/lon coordinates that I can then paste right into Google Earth: 31.996063441518004, 35.728730514891744. Make sure lat is first, and lon is second.

Tell el-Maṣfā

  1. In an article by Israel Finkelstein, Ido Koch, and Oded Lipschits, entitled “The Biblical Gilead: Observations on Identifications, Geographic Divisions and Territorial History,” it is proposed that Mizpah of Gilead be identified with Tell el-Maṣfā.
  2. The coordinates given are 227193.
  3. This gets expanded to 227000, 1193000.
  4. The convertor returns 32.32932657748971, 35.815608335148326 which can be used in Google to locate the site. (We note that these coordinates do not correspond to the hill that they have marked on the p. 143 photograph. It looks to me like their arrow needs to be moved about 1 inch to the left.)

Karm er-Ras

Finally, I was recently asked to make a map that shows Karm er-Ras in Galilee. The Hadashot Arkheologiyot article for this site gives very precise coordinates for each excavation area, both NIG and OIG. The OIG coordinates for Area A are 181580/239335. These are already six digits, so all I need to do is paste them into “The World Coordinate Converter” to get 32.74860752349965, 35.33387296365357.

Additional Notes

The OIG and NIG coordinates are measured in meters. If you are given three digit coordinates, then the accuracy could be off by about half a kilometer. If you are given all six digits, then your accuracy is sub-meter.

If the “The World Coordinate Converter” fails to load the Converter, you can still use the website to get the information you want. Once you select Israel 1923 and paste in your coordinates, a placemark will appear on the map with an info-window. The lat/lon coordinates that you can use in Google Earth appear within this info-window.

For batch conversions, you can supposedly import a CSV into Eye4Software Coordinate Calculator 3.2 (Windows only).  I have not successfully completed a batch conversion, but the software claims it can do so.

Share:
(Post by A.D. Riddle)

This posting will focus on two ways that Picasa can help you deploy the Pictorial Library of Bible Lands in classroom teaching. (See our first post on “Using PLBL with Picasa” here.)

First, we will show you how to use Albums to create a presentation on-the-fly using photographs that are located in multiple folders. This could be helpful if you are short on time, and the topic you are teaching or studying (such as Paul’s missionary trips) involves places or events across the Pictorial Library. First, browse or search for the photographs(s) that you want to include in your presentation.

When you click once on the photograph, it will be “selected” and two things will happen: a blue frame will appear around the selected image as below,

Left image is selected and has a blue frame.

and a thumbnail of the thumbnail (is there a name for this?) will appear in the lower left window of Picasa, in an area called the selection tray.

Selection tray with three selected images.

You can select more than one image at a time from a single folder using Shift or Control/Command keys. To select photographs from another folder without losing your selections from previous folders, click the “green thumbtack” button to “hold” the items in the selection tray. The red circle will remove items from the selection tray.
Selection tray buttons.
Once you have selected all the photographs you want to use in your presentation, click the “blue book” button for “albums.” It will open a menu that allows you to select an existing “album” or create a new “album” where you want to send the photographs. The images will not actually be moved.

Rather, albums are like “Smart Playlists” (or Dynamic Folders); you can add or delete albums without touching the original images. They allow you to mix-and-match into a single folder a variety of photographs that are located in several folders. All of the images in the selection tray will be “sent” to the album that you choose or create.

Albums button menu.

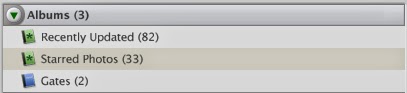
Albums can be viewed by clicking on “Albums” at the top of the left-side browser.

Albums browser with an album for “Gates.” 

With your photographs in an album, you can now arrange the order of the photographs by clicking-and-dragging the thumbnails in the main screen. Once you have the photographs in the sequence you want them, double-click the first photograph to go the “Edit Picture” screen. At the top is a Play button which will begin the slideshow presentation.

Play slideshow button.

Moving the cursor in slideshow view will cause a control bar to appear at the bottom. Here you can rotate a photo, zoom in, exit the slideshow, or make other adjustments.

Slideshow controls.

To return to the main screen from the “Edit Picture” screen, click the “Back to Library” button at top left.

Return to main screen button.

Second, we will show you how to use Picasa to create a Google Earth kmz file of locations containing image thumbnails. The secret to doing this is Geotags. Geotags are location coordinate information contained within the actual photograph. By clicking the blue “information” button in the Show/Hide Panels toolbar at the bottom right of the screen, you can view the photograph metadata. If a photograph is geotagged, the metadata will include a GPS Latitude and GPS latitude.

Show/Hide Panels buttons.

To geotag a photograph, click the red “balloon pin” button on the Show/Hide Panels toolbar. A window will expand on the right which looks just like Google Maps.

Places Panel.

Select the photograph(s) you want to geotag. (You can tag multiple photographs at the same time.)

Next, you need to find the location in the Google map. (Just like with Google Maps, you can switch to satellite view and zoom in/out.) There are a few ways to find the location. You can do this manually by dragging the screen with the cursor and using zoom controls, and then clicking the green “balloon pin” to drop it on the location. You can use the search bar under the map to enter the name of a location. The best method, though, since so many Pictorial Library places are archaeological sites, is to copy/paste the coordinates from the Pictorial Library’s Site Index into the search bar.

Once a photograph is geotagged, the thumbnail in the main screen will have a red “balloon pin” in the lower right corner.

Photograph with red “balloon pin” indicating
it has been geotagged.

To create a Google Earth kmz file, select the geotagged photographs you want to include. Again, you can use the selection tray as described above. For Windows computers only, go to Tools > Geotag > Export. This will create a kmz file from the photographs you selected. The kmz file can be opened in Google Earth or Google Maps, and it will contain yellow “pushpins” with thumbnail images of the photographs which have been geotagged to that location. (The kmz export feature is not available in the Mac version of Picasa. Instructions are here for accomplishing the same task.)

I can imagine this being useful, for example, if one is teaching on the life of Abraham. You can have “pushpins” at Haran, Shechem, Bethel, Hebron, etc. with thumbnails of Pictorial Library photographs. The kmz file can be distributed to students, or it might be used in classroom instruction. Perhaps a teacher might craft an exercise where students have to make a “map” of a biblical account using photos from the Pictorial Library.

This completes our series on “Using Pictorial Library of Bible Lands with Picasa.” Picasa can be a very helpful tool for locating and deploying the wealth of images in the library.

We close with a comment about the limitations of using the Pictorial Library only with Picasa (or similar applications). The photographs of the Pictorial Library come in pre-made PowerPoint presentations which contain the maps, abundant annotations in the Speaker’s Notes (see here and here), helpful labels, and have the photographs arranged in a logical order. Picasa misses out on all these features, so our recommendation is not to bypass the PowerPoints, but use Picasa in conjunction with them.

Share:
(Post by A.D. Riddle)

In a previous post, we made mention of the 17,683 photographs that comprise the Pictorial Library of Bible Lands (PLBL). That is a lot of photographs! And it is a lot of places! To help the user find what they are looking for and to navigate the library, we added some brand-new features such as maps (here and here) and a Site Index, in addition to the already-helpful Image Index, the organization of the library into volumes/regions, and the descriptive filenames for every single photograph.

In this post, we would like to draw attention to a free program named Picasa, by Google. I have found this to be one of the most helpful tools for digging into the hidden corners of the Pictorial Library. Picasa works on both Windows and Mac computers.

Once you download and install Picasa, you can specify what folders you want Picasa to scan (or index). The index database is sort of like an address book—it does not make a duplicate copy of the images, rather it tells Picasa where to go look to find the images. NOTE: Picasa will work best if you have copied the Pictorial Library to your hard drive.

Under the File menu, select “Add Folder to Picasa…” Here you can specify which folders you want Picasa to see (i.e. scan or index) and which ones you want Picasa to ignore. The window looks like this:

 Folder Manager window.

Once you have selected the folders you want Picasa to scan, it will begin to index the files. This could take quite some time since the Pictorial Library has lots of images, but Picasa has only to do it once.

In the lower right corner of your screen, a slide-out window like this will appear to notify you that Picasa is indexing the images:

Indexing slide-out window.
When Picasa has indexed the Pictorial Library, the main screen will look something like this:

On the left side, you see a tree diagram of all the folders Picasa has scanned/indexed, and in the main window, you see thumbnails of the photographs in the selected folder. Try double-clicking on one of the image thumbnails. (Once you do, a button will appear in the upper left corner with a blue arrow and the words “Back to Library.”)

At this stage, we can point out the first two benefits of using the Pictorial Library of Bible Lands with Picasa. First, you can quickly browse thumbnails of all the photographs in the entire Pictorial Library. Images will catch your eye that you may not have ever noticed before, or you may find yourself discovering whole portions of the library that were unknown. 

Second, in the top right of the Picasa window is a search bar. Thankfully, every single photograph in the Pictorial Library has been given a descriptive filename. When you type in places or other terms, the search engine will look for image filenames and folder names to isolate the relevant photographs—all at Google speed! You can search for a placename, a type of construction (e.g. gate), an object (e.g. lamp), an event (e.g. winnow), and so forth. The search bar looks like this:

Search bar.

Here are the search results for “gate.” You can see on the left side which volumes and folders have images of gates, and in the main window, you can scroll through the thumbnails.

We will discuss one other feature of Picasa in this post. When you search for a name or term in Picasa, the program is not only looking at filenames and folder names, but also “tags.” In a previous post about the Pictorial Library‘s Site Index, we highlighted that index’s usefulness because it allows you to find alternate names for a site that might not have been used in the image filename. The example we used was Ptolemais (Acts 21:7), which does not appear in the image filenames (Acco does instead). Well, all of the names from the Site Index have been added to the photographs as tags, so that in Picasa, you can perform a search for Ptolemais (or Akko or Acre or any of the other names or spellings) and all the photographs of Acco will appear. This makes it quick and easy to find places, even if you are using a different name or spelling!

In the lower right corner there is a row of four buttons that looks like this:

Show/Hide Panel buttons.

The third button has a cream-colored “shipping tag” icon. Clicking on it will reveal all the tags that have been added to a photograph. The Acco photographs have been given the following tags:

Tags panel.

Of course, Picasa is not the only program that can be used to browse and search the Pictorial Library.
Other such programs include Adobe Photoshop Lightroom, iPhoto (for Mac), and ACDSee Pro, as well as perhaps some lesser-known ones such as ShotWell, XnViewFastStone Image Viewer. And there are others.

In a future post, we will highlight two more features of Picasa that make it such an excellent tool for use with the Pictorial Library of Bible Lands. Of course, there is so much more that can be done with Picasa, but we leave that for you to explore and discover.

[Click here for Part 2]

Share: